Sunday, March 31, 2013

Chicken scratch

Nice day here in the Tetons. Got up to Teton pass this morning and found some good steep n facing chutes with surprisingly good snow. East facing corn harvest down low. Got back home and watched Giles setup his new trampoline and try to kill himself doing backflips. No boat work today. Back to work tommorrow for a few days. Will try and get more materials on the way ASAP.


Saturday, March 30, 2013

Side panels cut

Another warm one today. Woke up late from the gig yesterday and decided to put off skiing another day. Its been non stop work and skiing since november and since things have slowed down i need a couple days to just chill. Brewed a batch of beer with johnny today, a stone ipa clone. smells great, well see how it tastes 6 wks from now.tonight it was Time to get some work done. Today's mission was a nerve wracking one. Cutting my 1/2 corecell panels to size for side panels. Not nerve wracking because it was difficult to do, but because at $180 a 4x8 sheet even one wrong cut can get expensive in a hurry. Last night I made a simple jig to cradle the blade cover on my box cutter and keep it straight.. This jig holds the blade vertical and the guide runs along a fence for a straight and ideally vertical cut. I knew the chances of getting a clean cut were slim by hand and I did not want to screw it up. Corecell cuts easy with a razor but it Took about 6 passes to get thru. I clamped the 4x8 sheets to a chipboard 4x8 bottom with cardboard between and used a spare white oak batten I had laying around from the wood boat. As a guide and fence. I triple checked measurements before I cut and I checked and traced my panels when I made copies to ensure I had identical panels. Came out good. The side panel layout on this boat is like a highsided mckenzie but a little smaller to make the layout fit with 3 panels. A traditional high side mckenzie is 27" at the locks. Mine will be just under 26". The panel looks like a 16' ft mckenzie panel with 2" height added and 1' tacked onto the end for length. I'm leaning twords epoxying the pieces together. I need some fillers to do so, might be a couple days before I'm ready to glue the pieces together.


Materials are here

Flurry of activity yesterday afternoon at the old boat shop. Got a jig cut for a box cutter to cut side panels. Found a 10 ft strip of baseboard that's actually straight to use as a guide for me jig. Ups and FedEx both came with packages yesterday. Fiberglass from either side of the country. Glass and poly from raka. biax, tape, and peelply from fiberglass supply and some random other pieces. My box of discount 8 oz e glass scraps from eBay arrived a few days ago. Still waiting on the vacuum bag supplies to start glassing. But in the meantime ill cut and try and glue the side panels. Just realized today I forgot to order fillers..silica and microballoons. Ill need that stuff if I am gonna use epoxy to join the side panels. I may use sikaflex caulk, but that will put the side panels out of commission for a bit while the glue dries. Also realized I need a few more yards of biax tape. And real bagging film and tack tape.There's probably a few other things I forgot. Ill have to get my act together on Monday ordering the last bit of stuff.


Friday, March 29, 2013

Determined to get something done

When I woke up today it looked like a subpar day for skiing. My partner bailed early this am, but I sat around wishing I could get something done today. Waiting on the big glass order to get here from raka and fiberglass supply.I decided to go out into the shop and at least cut a temporary bulkhead former. One thing that is for certain, I need a 53" widex79" beam bulkhead dead center on the sheer line. This had been a constant, so I figured why not do something. The other chip board pieces i have for temporaries are on the floor in The garage so i can work with the corecell in the next few days. once i get the side panels glassed ill pull that floor and use those pieces for temporary formers. I fired up the stove, and got to work. I have chose to lop the chine corners off and reassemble the two pieces with a shim between. This will allow me to get into the chine area should I need to glass or fillet with any of the formers in place. I built shims and plywood mending plates for all 6 conceivable bulkhead locations. Ill probably lop the tops of the bulkhead formers off just shy of the gunwale line so i can tacky tape the edge to bag the side panels. With temporary bulkheads and spanners ill probably have about 8-9 locations. Ill wire in the final dimensions when I get to full scale. Next formers to make are the 52" width, 78" beam stations that go 1.5' in front and behind the center bulkhead to create a flattish area that has consistent flair but no parallel chine. Tonight ill build a jig to use a box cutter to cut my 1/2" corecell side panels to shape, and ponder the best way to join the panels.


Vacuum bagging on the not so cheap...

From montana riverboats

So my original plan was to bag on the cheap so I didn't end up spending a fortune. I planned on using cheap alternatives for materials, a cheap vacuum setup, do everything on the quick and dirty. Vacuum bagging isn't a super complicated concept, there's plenty of ways to do it, especially for small parts..either flat or contoured around a mold.

I dunno wether it was common sense, or being talking myself into just throwing down on the real stuff I needed where I needed it, but I threw down a little bit to try and make sure this gets done right. Cost a good bit, but whatever...

Some of it was difficulty sourcing alternative materials. Dacron suit fabric makes for great peel ply. However getting 65 yds of fabric wide enough to peel ply a boat with is easier said than done. In the end having the local fabric store order stuff in might have costs barely less than getting real peel ply from fiberglass supply after talking them down in price a bit, so I just went with that. The 60" fabric gives me an extra 12" width of running length extra fabric so ill be able to use that to peel ply all my taping.

Another thing was deciding where to use the real bagging film instead of poly. Most of my parts are flat stock, so ill use the cheap poly bag there. I bought a little handheld sealer...may get another handheld bag sealer to make custom sized bags, then tape over the edges. Ill get some brand name butyl window tape for where I need tack tape. For the hull, ill need the bag to contour around the chine. Decided ill use a few yds of real bagging film for this application. May get one roll of real bag tape for here.

I still plan to use cheap consumables where I can though. Ill use the heavy shop paper towels as breather, maybe a little bubble wrap on smaller pieces. Ill get some poly batting fabric for breather where I need more bulk like around the air hose or between separate pieces of work. Butyl tack tape wherever I can to seal custom made poly bags.

Last order of business was equipment. Pulling a vacuum can be simple or complicated in terms of equipment. Easiest way to do it is to get a small vacuum pump, run it thru a ball valve to a gauge to a check valve and then out to the work. This runs the pump continuously but a vac pump should handle it fine. Alternatively if you have a compressor, you can get a small Venturi adapter to pull vacuum for reasonably cheap. This still runs the compressor constantly. If you don't want to run the compressor you have a few options. First is to babysit the work. Pull your original vacuum, get the bag situated, make sure the work is not leaking..then go have a beer. Come back and check the pressure every now and again, and crank the pump on if it needs more vacuum. Do it till its cured...time consuming, not unreasonable though. The easier way is to setup a pneumatic valve and a vacuum controller to turn the pump on when necessary. This introduces other problems like unloading back pressure and having reserve vacuum. www.joewoodworker.com has plan for auto cycling vacuum presses using both a vacuum pump or a Venturi. He sells the parts either as a kit or individually at a pretty good discount. If you live near a big box store tho u may be able to do the same or better for alot of the stuff locally.

My original plan was cheap and simple. A borrowed 5cfm rol-air air compressor, a $15 Venturi from harbor freight, and. Vacuum gauge, ball valve, check valve, and some readily available plastic soda dispensing caps. It would have worked fine, but I would have been running that loud compressor constantly, and it would have gotten on my nerves and maybe my neighbors too. In addition, the cheap harbor freight Venturi looks chinsy and I have heard reports they gulp air to get to full vacuum and really only produce about 2-2.5 cfm. That probably would have gotten me thru most everything, but bagging the hull is gonna require some juice. I'm sending it back. A real Venturi costs $55 to produce 3 cfm. It would work with my compressor but the compressor is borrowed and at some point in the next month or so my buddy JT is gonna need it back. That's means I would then have to go out and buy a 4-5cfm compressor to finish.
I decided to throw down an extra $30 now rather than have to spend more later and bought a refurb Thomas veneer vacuum pump for $85 out the door on eBay. It pulls 3.5 cfm and should have enough juice to pull the whole hull, especially if I beef it up with reserve reservoirs and a cycling on off system. I threw down another $100 to buy a bunch of supplies from veneer supplies.com, the joe woodworker sister site. Im going to build a version of his project evs vaccum press. I got a bunch of fittings, check valves, ball valves, vacuum gauge, and a vacuum controller. I have some 15" lengths of 3" PVC for the reservoirs and resin trap. And I got all the electrical stuff I needed at the restore for $1. I threw down on a real thru bag fitting too just make my life easier as ill be bagging a bunch of panels. Soda valves would have worked, but work have required to much fiddling to save a few bucks. Looks like the best homemade valves are made from car tire valves with fender washers and rubber gaskets. I may make a second thru bag fitting and keep this harbor freight thing around as a backup or maybe to run two systems at once if I need more vac. Hoping my Thomas pump should get the job done here, I'm not veneering hardwoods here, just trying to pull the excess resin out. I'm in about $200 on the whole pump setup and I figure I can either sell the Thomas pump when I am done for what I bought it for, or sell the whole press on eBay and make most of my money back.

Anyhow, parts should be here next week. Hoping to get side panel material cut and a few temporary formers made in the meanwhile. Still waiting on the big order of glass to get here from raka and fiberglass supply. Then on to manic boat building next few weeks.

Thursday, March 28, 2013

More models

Here's some of the earlier models to show some of the process.

The small 6 pack tecate boats got me in the ball park, then I went bigger and refined, then went to 1"=1' and tweaked lines and bulkhead locations. There's been a few models since. The wooden model I build for my sister as a wedding present. I still owe her a mini set of oars, but one thing at a time.


Models

Getting the lines refined before I glass up the panels and go full scale. I'm almost where I want to be. I want to narrow the tail slightly and pull a little rocker down just behind the flat spot with a little less flair, probably split the differance in flair angles between station 5 and the transom for station 6, then dial in the final width. I may make one more model with 1" of chine dish, well see. Then it's time to go full size. i have a little time to decide, but its sbout time to get started bagging the side panels and get to some assembly

The design is a 17x54 hiside mckenzie with a curved stem and transom bottom. It has a 3 ft flattish spot in the center. It carries the same flair in the 3 bulkheads thru the 3 foot section. But the center of the three bulkheads is an inch wider than the outer bulkheads. This creates a flattish spot but with no parallel chine. The stem has an arc about 1.5" deep cut from straight with a 16.5 cutback along the sheer. The arc pulls the floor up right at the stem bottom and raises the tip slightyly. its functional snd asthetic. The transom is a 10" cut along the sheer and has a 6" radius cut along the bottom corner of the panel. I tried to keep a lot of width thru the center section. I like the idea of short and fat.

The boat will be fully decked Grand Canyon style but will also fish 2 people and seat 4 people comfortably. It will self bail although the front passenger well will bail with a pump.

The other boat in the pictures is a ray heater 17x54 I pulled measurements off of. I built a model of it just so I could have something else to help visualize what I was doing with my models and to give some perspective. I have built a lot of models now. Really starting to refine the lines and get them wired. After 10 or so you just fly thru them. Hoping when it's time to go full size ill be just as fast


Great march skiing!

Been a great late march here in the Tetons. Great powder skiing! Here's some pics from snowboarding in grand Teton national park from the last month. Alot of these are cross posted from instagram. You can check more out on my Instagram feed www.instagram.com/chris_towles


The shop and the garage

Here's some pics of the woodshop with a Woodshop and the garage. I've cleaned the wood shop out to use for fabricating parts and doing woodworking. It's a good workspace with heat and will be great for making parts.

The garage has been a long project. When I started the roof leaked horribly and it was drafty. I tarped the roof and vapor barriered the entirety of the inside roof and walls. I jigsaw puzzled r max scraps and blue board I got at the restore. It was still a big space though and I don't have a good heater. My boss JB is lending me a reddy heater, and I have some small electrics. I decided to further quarantine air space by hanging a false ceiling and wall from plastic that was laying around and some cheap poly tarps from the dollar store. Then I hung another as a curtain over the barn door with ropes to tie it up. Its an easy bay to heat now. I'm not too invested financially and it's starting to look like a work space. Hoping to start working very soon.


Getting started

From montana riverboats:

I swear getting started on a project is the toughest thing. But after more time than I like having passed (like a year), I'm finally ready to really get cracking on my boat build.

My first boat was pretty easy. I built it out of Doug fir...all of it. Doug fir everything. Material was readily available down the street for real cheap, and the carpentry while challenging at times was nothing above and beyond what I had done before. There was no t a ton of glass to do. I built it in the driveway, with a boat cover and a sun shade pop up tent. The weather was a challange, but eventually rainy spring led to typical hot and dry Jackson summer, and I had her on the water by August. No sweat...

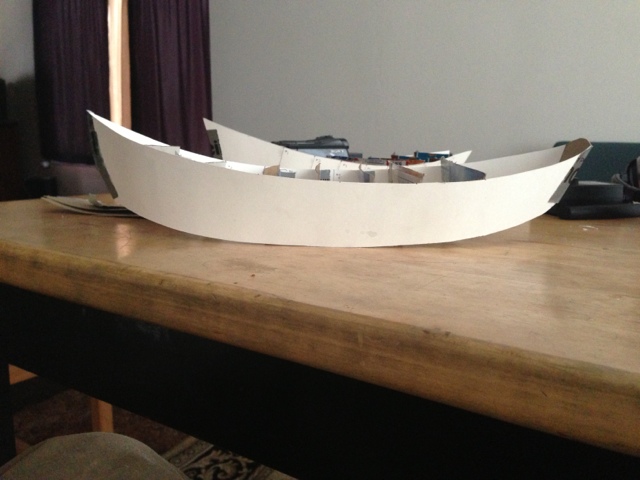
However, while I love that boat to death, it's not exactly what I wanted. You always want to do something better the next time, and i had alot of ideas about better ways to do things, so I decided to start with a blank slate. Now the real process started...I had to figure out what it was that I wanted. What it was made out of, how it was gonna come together, and what steps I needed to take to make all that stuff and a whole lot more and make it float. So it was mucho research and reading, making drawings, building models, researching more advanced fabrication techniques that I had seen used successfully in other applications and deciding how I was going to integrate that into the build. I filled up and entire graph paper notebook with drawings and notes, measured like 5 different designs and compared lines, built 10 models refining my own lines and slowly trying to achieve the exact rocker profile I was after. Actually..even now i'm still building models trying to get as close as possible before I go full scale.

Then there was the issue of workspace. The basement apt I was living in had no covered storage, and there was no way i would build another boat in the driveway, so I went on like a year and a half long house hunt til I found my current digs which I've been at for the last year or so...the perfect hideout for ski bum boat builders. I found a relic of a house sitting on a huge piece of property in e Jackson. Its an old farm house, and The place is like a compound, abutting the national forest.. 2 min from town. I have a barn big enough to have 2 boats in, plus a covered storage area (3 boats :) ), a woodshop with a woodstove which is big enough for doing carpentry or fabricating pieces or panels. Quite the score in terms of accommodations and reasonably priced at that. But when I moved in it wasn't all gravy. The barn had a leaky room, no insulation, drafty as hell. I figured if I wanted any chance at having that be a useable workspace it needed some love, so literally hours before the first snow of the year (well into the dark) I affixed a massive 28x28' heavy duty tarp over the roof. I found some cheap 3mil painters plastic tarps at the dollar store and went to town stapling that as an inner roof, vapor barriering the entire roof and walls. I scored a ton of free r max foam insulation scraps in random sizes from a buddy that is an hvac guy. I jigsaw puzzled the pieces together and covered all the outer walls floor to ceiling, And I had a semi insulated garage. It's a big space so i further plan to staple a false ceiling and wall blocking off just one garage bay size area so I can heat more efficiently, and I may rig a tent system so I can tent work and just run an electric heater out there. Otherwise I gotta find a propane heater that throws some btus. But the garage is now at least a useable workspace, And my total cost was probably like $125 or something...chump change.

But the last thing was what eluded me the past few years. Getting all the materials together. Lifes tough when youre a poor skid trying to make a living in a rich ski town. Waiting tables and skiing everyday is not a rich man profession. lots of living paycheck to paycheck, and saving anything is damn near impossible.I bought bits and pieces here and there the last few years preparing for this build, but it was the $3000 or so I was gonna need to throw down on core material, glass, epoxy, and hardware that seemed like it held my build up forever. Last winter I went into winter in good shape, I had saved the full budget for the boat. Took like a month of work to source all the materials , but shipping was a problem with the foam core. In the Mele of trying to get thru to sales guys, I blew up my truck...like kapuut! 10k for a new truck later, and a then a trip down the Grand Canyon, and my boat fund was at like -$8000...yikes. So I get back on my feet again financially, but then had to go to the dentist,$6000 later and my boat fund in still in negative numbers. Then like a miracle...guiding season! Out on the river every day, catching fish, makin money, life is good. A slow off season ate some of my saving, but finally got back to work now that ski season and tourists are upon us again. Made enough money over the holidays to get life backs together, and the first thing I did was call and get like $1000 worth of corecell on the way. Also been trying to button up my plascore order for interior panels, and getting a shopping list together for resin , fabric, and vac bag supplies which I Hope to order in the next week or so.

It's been so much work just planning and getting ducks in a row, I'm just happy to finally get to building! I feel like that's gonna be the easy part. It's like a river trip. You spend forever and a day planning, and calling, and making arrangements, and buying stuff. Then you get to the river, shove off and hope you covered all the bases, and whatever happens happens...you go with the flow. Anyhow, end of rant, I'm just happy that the final piece of the puzzle is coming together. Now it's Time to get into the shop and get to work!